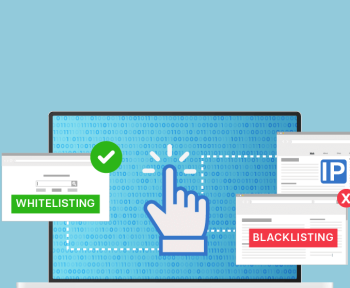
Whitelist — a list of placements/sources you explicitly allow. Everything that’s not on the list is blocked by default.
Blacklist — a list of placements/sources you explicitly block. Everything else can run unless you later decide to cut it.
By “placements” I mean for example:
- improve traffic quality;
- protect yourself from fraud and “noise”;
- control conversion cost;
- balance volume and efficiency.
But in reality this is also where things break most often:
too narrow whitelist → no traffic,
too aggressive blacklist → volume crashes, CPA jumps, panic in chats.
Let’s walk through, step by step: when you actually need a whitelist, how not to make it “too tight”, and how to maintain blacklists without panic and losing all your volume.
1. What whitelists and blacklists are (really)

Whitelist — a list of placements/sources you explicitly allow. Everything that’s not on the list is blocked by default.
Blacklist — a list of placements/sources you explicitly block. Everything else can run unless you later decide to cut it.
By “placements” you might track for example:
- website domains;
- apps;
- publishers / sub-identifiers (site_id, placement_id, sub_id);
- bundle id, channel, zone, etc. — depends on the network.
Core idea:
- Whitelist = concentration: keep only the best.
- Blacklist = hygiene: gradually clean out trash and fraud.
2. When you really need a whitelist (and when it only gets in the way)
When a whitelist is a must
- New offer with strict KPI
When your budget is limited and your CPA/ROAS target is tough, it’s logical not to start from “the whole network”, but from a proven subset of quality placements.
It makes sense if:
- you already ran in this network and know which sources convert;
- you have historical data for similar offers;
- you have an internal or external list of “top suppliers”.
- Sensitive brand / strict brand safety
Think banks, healthcare, government, kids’ products. You cannot afford to show ads on:
- adult websites;
- pirate or shady sites;
- political/extremist content, etc.
In this case it’s easier to pre-approve a whitelist of domains/categories than to fight a reputation crisis afterwards.
- Working with premium, limited inventory
For example:
- premium news media;
- major publishers;
- high-quality in-app inventory.
Here you consciously sacrifice reach, but bet on quality.
When a whitelist does more harm than good
- You’re new to the network and have no data
If you just entered a new ad network and have zero historical performance, a tight whitelist often means: “we’re targeting blind, and also limiting ourselves”.
In that case it’s better to:
- start a bit wider (no whitelist);
- collect initial stats;
- build the first whitelist from real data later.
- Small budget / soft KPI
If you don’t have ultra-strict CPA/ROI goals and your mission is “get volume and learn”, a whitelist only cuts your reach. These campaigns are easier to run with a blacklist-first approach.
3. How not to suffocate your whitelist
Classic mistake: you take 10–20 “favorite” placements, turn them into a whitelist — and volume doesn’t grow. Bids are high, but impressions are still tiny.
Principle 1. Start broader, tighten later
If your brand and offer allow it, use this logic:
- Start “moderately broad” (no whitelist, only basic blacklist by obvious bad categories).
- Collect data for at least:
- 3–7 days with stable traffic, or
- N conversions (e.g. 100+ leads or 200+ installs).
- Select top sources by:
- CR (conversion rate);
- CPA/CPI;
- quality metrics (retention, approvals, ROI, etc.).
- Build your first whitelist from these real winners.
This way your whitelist is based on numbers, not on random guesses.
Principle 2. Don’t make whitelists out of 5–10 placements

As a rule of thumb: a whitelist of 5–10 placements is not a whitelist, it’s a choke point.
Rough guideline:
- For at least somewhat stable volume in a big network, you usually want:
- 50+ placements minimum for a whitelist start;
- ideally 100+ as you expand.
If you see that:
- you’re already bidding aggressively on your current whitelist, and
- still can’t get enough volume —
→ the answer is expand the whitelist, not squeeze it further.
Principle 3. Split your whitelist into tiers
Instead of one big “good list”, it’s much easier to manage a tiered system:
- Tier 1 (Core whitelist)
Best of the best: top CR, low CPA, strong quality.
For these you can:- run a separate campaign;
- bid higher;
- prioritize budget.
- Tier 2
Solid, middle performers: acceptable KPI, decent volume.
This is your main scaling pool. - Tier 3 (Test pool)
New or uncertain sources with potential.
They:- run with capped bids/budgets;
- can graduate into Tier 2/1 if they prove themselves.
Your whitelist becomes a living system, not a static “holy list”.
4. Blacklists: how to update them without panic and killing volume
The other extreme: campaign misses KPI → someone checks the report → sees “suspicious” placements → drops dozens/hundreds of sources into the blacklist → traffic collapses, algorithms break, chat is on fire.
What not to do
- Don’t cut everything that didn’t convert for 2 days.
Some placements:- have slower conversion cycles;
- convert with a delay;
- depend on time of day or weekday.
- Don’t blacklist after 1–2 clicks or a handful of impressions.
You need minimum volume before you decide a placement is truly bad.
A more systematic way to handle blacklists
Step 1. Define thresholds for decisions
For example:
- minimum X clicks (or impressions) before evaluation;
- minimum Y spend per placement;
- observation window (e.g. 3–7 days).
If a placement hasn’t hit these thresholds yet, it’s too early to blacklist it.
Step 2. Separate reasons for blocking
- Hard reasons (block immediately):
- obvious fraud (bots, click flooding, abnormal patterns);
- brand safety violations;
- prohibited content (adult, politics, violence — if critical for your brand).
- Soft reasons (block based on performance):
- CPA/CPI much higher than campaign average;
- very low CR with enough volume;
- bad post-conversion quality (refunds, churn, rejection rates).
Here you act like this: enough volume + consistently bad KPI → candidate for blacklist or downgrade.
Instead of blacklisting — “downrank” the source
Sometimes a placement:
- is not great,
- but also not a total disaster.
Instead of putting it straight into the blacklist, you can:
- lower its bid (if the network allows bid by site/sub_id);
- move it into a low-priority campaign with smaller budget.
You don’t kill volume completely, but you stop weak sources from eating the main budget.
5. How often to update white/blacklists

The key is: lists should move, but not twitch.
If you constantly re-write them every few hours, optimization algorithms never stabilize.
Reasonable rhythms:
- Active testing / new campaign:
- review placements every 1–2 days;
- big structural changes – no more than every 3–4 days.
- Stable setup:
- review 1–2 times per week;
- urgent changes only for fraud or hard violations.
Main idea: lists are dynamic, but not hysterical.
6. Practical checklist: how not to lose volume
Before you turn on a whitelist, check:
- Do you have enough candidates (50+ placements, ideally 100+)?
- Have you checked them by:
- conversion rate;
- CPA/CPI;
- quality metrics (LTV, approvals, retention, etc.)?
- Are you not over-restricting:
- geo;
- device;
- time of day?
- Do you have a plan for expanding the whitelist:
- test campaigns;
- Tier 2/3 test pool?
Before you send a placement to the blacklist, ask yourself:
- Do I have enough data on it:
- more than N clicks;
- more than M spend;
- reasonable observation window?
- Am I sure the issue is the placement, not:
- creative mismatch;
- landing page problems (slow, broken, not mobile-friendly);
- wrong targeting/segment?
- Is this a hard reason (fraud, brand violation) or economic (too expensive)?
- hard reason → blacklist now;
- economic → maybe try lower bids first.
7. Common mistakes and how to avoid them
Mistake 1. “Favorite placements” whitelist forever
Scenario:
you once built a list of winners (for a past offer), turned it into a whitelist — and never touched it again.
Problem:
- markets change;
- audiences burn out;
- publishers change their own monetization.
Fix:
re-check your whitelist every 1–2 months,
add new winners from test pools,
remove sources that consistently miss KPI.
Mistake 2. Panic-driven massive blacklist

“Yesterday KPI dropped → today everything that didn’t convert goes to blacklist.”
Problem:
- you confuse algorithms;
- you block learning;
- you destroy your own reach.
Fix:
- define clear thresholds;
- separate hard vs soft reasons;
- don’t make global decisions based on a single bad day.
Mistake 3. No lists at all
“Why bother with whitelists/blacklists? Algorithms are smart.”
Over time:
- weird sources slip in;
- you pay for a lot of junk;
- fraud and low-quality placements accumulate.
Fix:
- at least maintain a basic blacklist: known fraud/bad placements;
- review periodically;
- as you collect data, gradually move to more granular list management.
8. How to organize work with teams and partners
If you’re not working alone, you really don’t want whitelists/blacklists living in someone’s private file that no one else can see.
Good practice:
- Single source of truth
A shared spreadsheet / CRM / internal tool where the current whitelist/blacklist for each network/offer lives. - Clear update rules
Who is allowed to make changes, conditions for adding/removing placements, and minimum stats required to take action. - Change log
When the placement was added/removed, why, and who requested the change.
That’s how you avoid “someone blacklisted something, volume dropped, and nobody knows why.”
9. Example table template for whitelists & blacklists
Below is a simple table template you can copy into Google Sheets / Excel / Notion and use as your master file for managing placements across campaigns and networks.
Master placements table (example)
| Network | Offer | List type (WL/BL) | Tier (for WL) | Source ID (site_id / sub_id / bundle) | Domain / App name | Status (active / paused / removed) | Reason (performance / fraud / brand / test) | KPI snapshot (CR, CPA, ROI) | Date added | Added by | Notes / context |
|---|---|---|---|---|---|---|---|---|---|---|---|
| Network A | Loan EU | WL | Tier 1 | 12345 | example.com | active | performance | CR 4.2%, CPA $8 (target $10) | 2025-11-10 | Alex | Top source for DE & FR, prioritize |
| Network A | Loan EU | BL | – | 98765 | shady-site.net | active | brand | – | 2025-11-12 | Maria | Adult content, blocked immediately |
| Network B | App US | WL | Tier 2 | app_567 | Example App | active | performance | CR 1.8%, CPI $1.4 (target $1.5) | 2025-11-15 | John | Stable volume, average quality |
| Network B | App US | BL | – | 4444 | – | active | performance | 0 conv / 150 clicks / $60 spend | 2025-11-18 | John | Over 3x target CPI, moved to BL |
How to use this template in practice
- Filter by network/offer to see active whitelists/blacklists per setup.
- Filter by list type (WL/BL) when you want to export lists to an ad network or share with a partner.
- Filter by “Tier” to quickly see your best Tier 1 sources and your test pool.
- Use “Reason” + “KPI snapshot” to understand why something got onto a list (no more “who did this and why?”).
- Use “Date added” to review older decisions and possibly re-test some placements later if conditions change.
10. Conclusion: treat lists as a living system, not a one-time setting
Whitelists and blacklists are not just checkboxes in the UI. They’re core tools for:
- controlling traffic quality;
- protecting your brand;
- managing CPA/ROI;
- scaling without chaos.
Key ideas to take away:
- Whitelist = focus on the best traffic and brand safety.
- Blacklist = keep inventory clean and economics healthy.
- Don’t make whitelists tiny and static.
- Don’t turn blacklist management into a daily panic.
- Base decisions on data, not vibes from a single bad day.
If you build even a simple, consistent process around whitelists/blacklists, they stop being a source of stress and become one of your strongest levers for performance and control.